May 6, 2024

Check back for daily updates..

How to put a Yamaha R1 engine in a Toyota Scion IQ

The overheating issue..

Originally I had installed a brand new GPI over sized Yamaha R1 radiator with a single fan thinking that it would be sufficient enough to keep the R1 engine at the correct operating temp of around 220*  in fact I thought it would help it run cooler but It consistently ran 220-240* and that`s way too hot.

Turns out the R1 runs extremely hot by design so getting the heat out from under the IQ engine bay is not something the standard setup was able to deal with.

The R1 also has a water cooled Oil cooler, which means the oil is heating the water up even more, or vise versa.

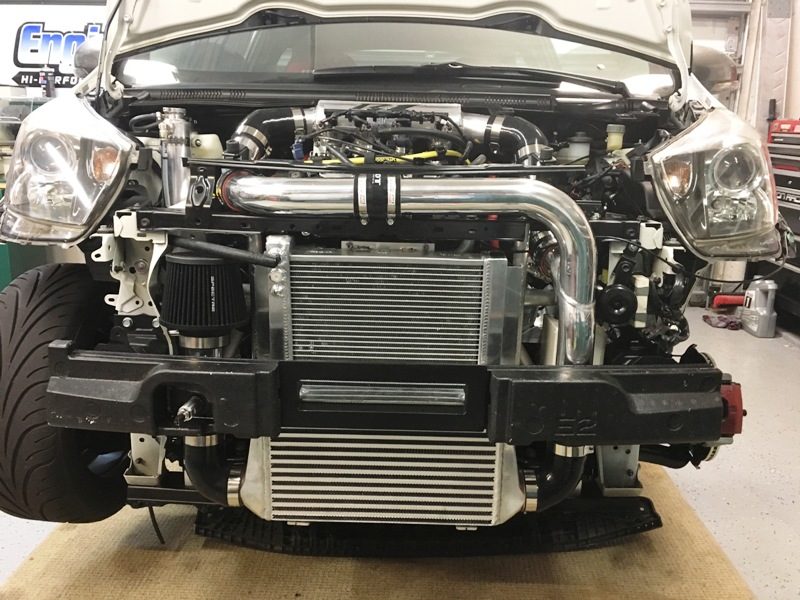
Another issue I had was the single air intake which went through an inter-cooler and split into two parts either side of the manifold, It really wasn`t that efficient and left no room for a larger radiator.

So I decided to upgrade the whole cooling system from scratch,

Here is how I did it..


The original setup

Head Gasket Check

As a precaution I ran a dye based head gasket check to see if the head was blown. If it was maybe that was the cause of the overheating.

No problems !

After warming up the engine and revving it a few times to get the coolant bubbling the leak test came back good, so at least I don`t have to replace the head gasket.

 VW Golf VR6 radiator from GPI

I decided to use a Golf GTI radiator from GPI, it was approx 50% larger and had room for 2 fans instead of just one. The mounting brackets were easily adapted to fit the front of the IQ and it was all aluminum.

Fan Brackets

I welded up an aluminum frame for the two fans that used the existing mounting tabs on the new radiator.

The inlet and outlets were also modified so they would line up with the R1 hoses.

Mounting the fans

The two 10" fans were fixed to the frame using stainless screws, the wires ready to be connected.

This fan setup is twice as efficient as before.

One fan is operated by the thermostat, the other one is by a manual switch on the switchboard should the temp get too high.

Fitted on the radiator

The whole assembly was mounted to the radiator using rubber washers and stainless screws using the stock threaded pillar mounting points.

Depending on the final temperature read out I might fit a fan shroud for more efficiency.

Mounting the Radiator

The intercooler was removed and discarded in order to have room for the new radiator, and the new Oil cooler 

The fitting of the external Oil cooler is explained on another page located in the side menu or you can find it  Here

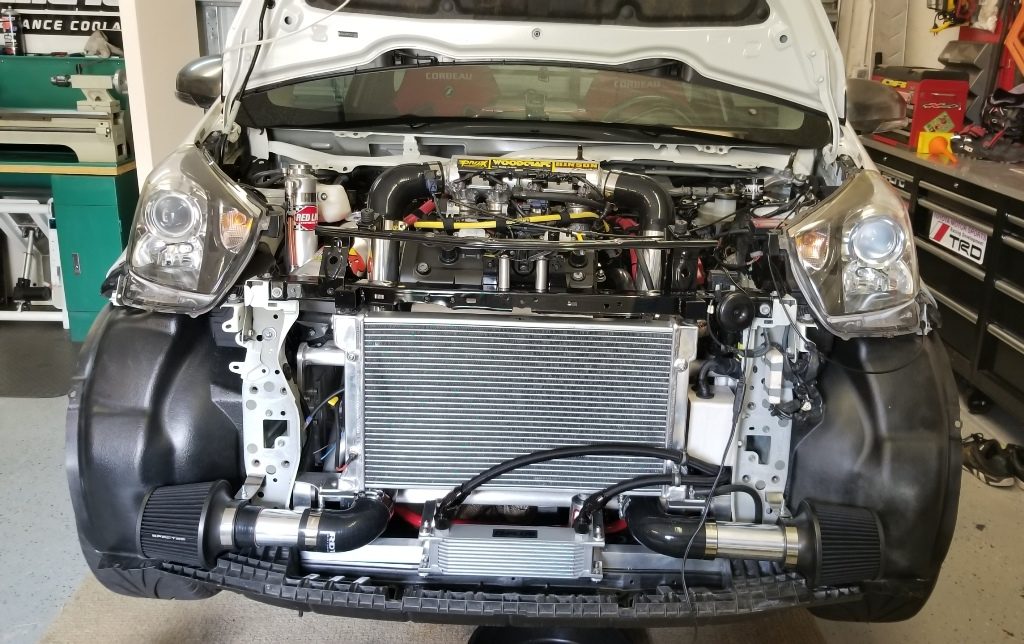
New placement

The new radiator was positioned further away from the engine by about 2" this allowed for a little more airflow and less heat from the header pipes reaching the fans.

The radiator was rubber mounted using two tabs welded onto the top frame rail.

Shielding the heat

I relocated the top water outlet which originally ran across the top of the engine. This allowed me to install a 22swg stainless steel heat shield to the top of the headers. This area gets really hot so every little helps.

Radiator is installed

Re routing the top hose, re attaching the header can and checking to see if there are any leaks. All looks good so far. Once everything is back together I will test it out and see if the temp stays on or around 220*

Along with the new radiator was the installation of the external Oil cooler, The intake system was also adapted to fit around the new setup. I made good use of this by mounting dual inlet cone filters down low and in line with each of the open front side inlets on the stock front bumper. These mods are shown on separate pages, you can locate them in the sidebar menu.


I will give an update on how it all works out.