Getting the fuel to the engine
Adapting the very narrow 4" high IQ gas tank to accept the R1 fuel pump was not really possible.. unless I cut a 6" hole in the drivers side floor and had the fuel pump sticking up 4" between my legs somehow did not seem practical.
So I had to figure a way to get around yet another issue. My only option was to add a separate 8 gallon fuel cell that could be mounted in the back of the IQ behind the front seats,(where the rear seats used to be) I figured I could gravity feed a separate canister that would house the R1 fuel pump. As long as the flow was not restricted and had enough volume to keep the Pump canister full of fuel it would not be a problem. So with this plan I started fabricating the canister and buying the fuel cell and fuel lines and all the other parts needed, I also added an in line filter for good measure..
This is how I did it..

Deleting the Gas tank
The existing IQ Gas tank was no longer needed and could not be easily adapted, plus I did not want to ruin a perfectly good IQ tank by drilling a 6" hole in it.. No point in carrying around dead weight, so it was removed from the IQ. Including the wiring, Fuel lines and all the rest of the parts shown in the photo I was surprised how heavy this was, even empty it was still about 30lbs

No more filler cap
I also deleted the filler cap, fuel lines and evap canister, (which was replaced with a smaller one link Here) The filler cap was left in place but was blanked off with a round piece of carbon fiber under the flap. I am trying to keep the whole system sealed so I did not want to add an external filler tube and run the risk of overfilling the fuel cell, so now I just fill it up from inside the rear hatch and keep an eye on the fuel level.

Fuel pump Canister
I used a 6" aluminum tube 12" long that was slightly flattened to house the oem R1 fuel pump.
I only have this one photo but there was a lot of work that went into fabricating this, The 10AN fitting on the side is fed by the 8 gallon fuel cell in the car. The R1 pump actually mounts Under the canister so it had to be completely flat to get a perfect seal.
The 2 bolts shown are rubber mounted to 2 brackets on the front sub frame.
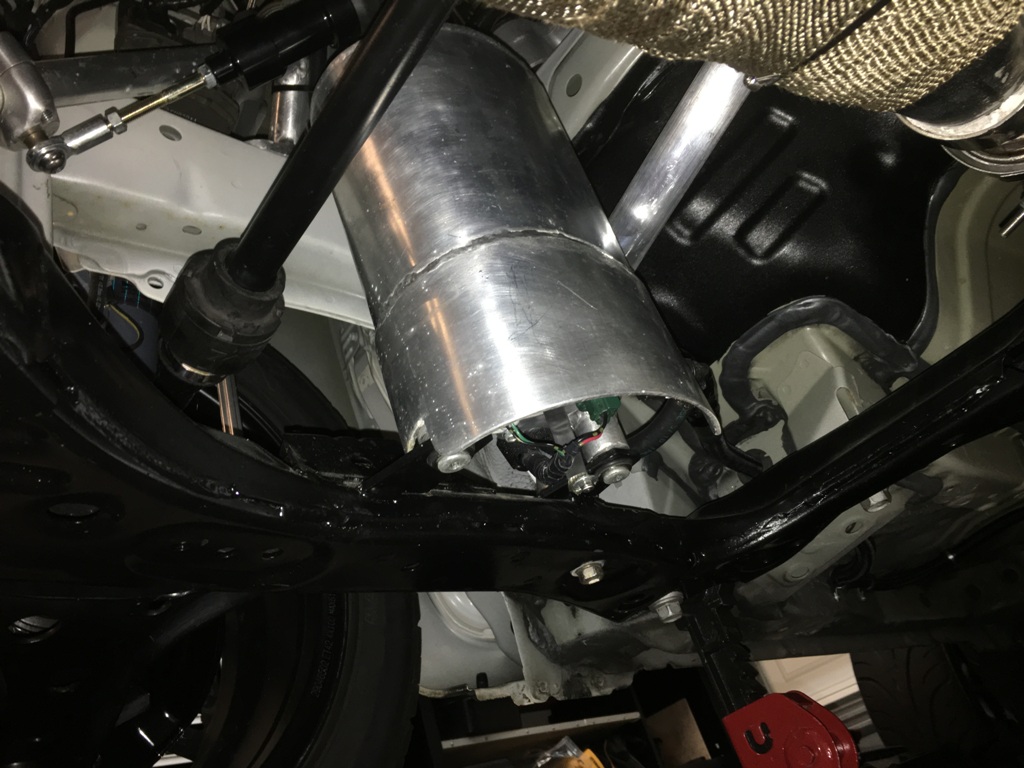
Bolted in place
Here is the canister mounted to the sub frame, the 10AN feed line is at the back, the other connections are high pressure feed to the injectors and a return line. The canister has a ground strap as does all parts of the fuel system.also the electical connections are power to pump and fuel level sensor.
")
R1 Fuel Pump
I picked up this fuel pump used from eBay, cost $85 which seems fair as it came with the bracket, seal and hoses. eBay is great for searching parts.
Once the pump is in the canister it is submerged in the fuel supplied from the rear cell, gravity keeps it topped up, the fuel cell is slightly higher than the canister, acceleration and deceleration should not effect the supply because it`s a sealed system.

Rubber mounts
Shown here is one of the rubber mounts, the pump sealing bracket screws into a 1/2" plate at the bottom of the canister, the mounting holes were blind drilled and tapped so no fuel would leak out of the threads. On the top of the canister there is another 10AN fitting and hose that vents the fumes and stops a vapour lock, this vents to the back of the IQ through a charcoal EVAP canister link Here.

Supply line
Shown here is the fuel supply line from the rear fuel cell. The hose is 10AN stainless braided PTFE, the fittings are all aluminum 10AN.
It was important to keep the hose flat to the underside of the IQ to avoid any high points that could trap air. The line goes through a fuel filter.

30 micron pre Fuel filter
To keep any debris from entering the fuel system this 30 micron billet aluminum in line filter was installed. The feed is from both sides of the fuel cell, this avoids any issues with fuel starvation under heavy cornering. both lines come together through the T-connector to the filter. The pump has a filter so this acts as a pre filter. it can be unscrewed and cleaned when needed.

Fuel cell connections
Here is the supply connections that go from the cell to the filter. The cell sits on four 2"X 2" aluminum blocks that keep the cell level with the floor of the rear compartment, then secured with 4 stainless captive bolts and aluminum washers. The floor is covered in heat retardant matting.

Vent lines to EVAP
Both the vent lines exit as high as possible to avoid up spill, then go down to the charcoal EVAP canister under the rear of the IQ. The front vent line from the Fuel Pump canister also connects to these with a "T" piece, Once vented through the EVAP canister there is no fumes or smell of gas.

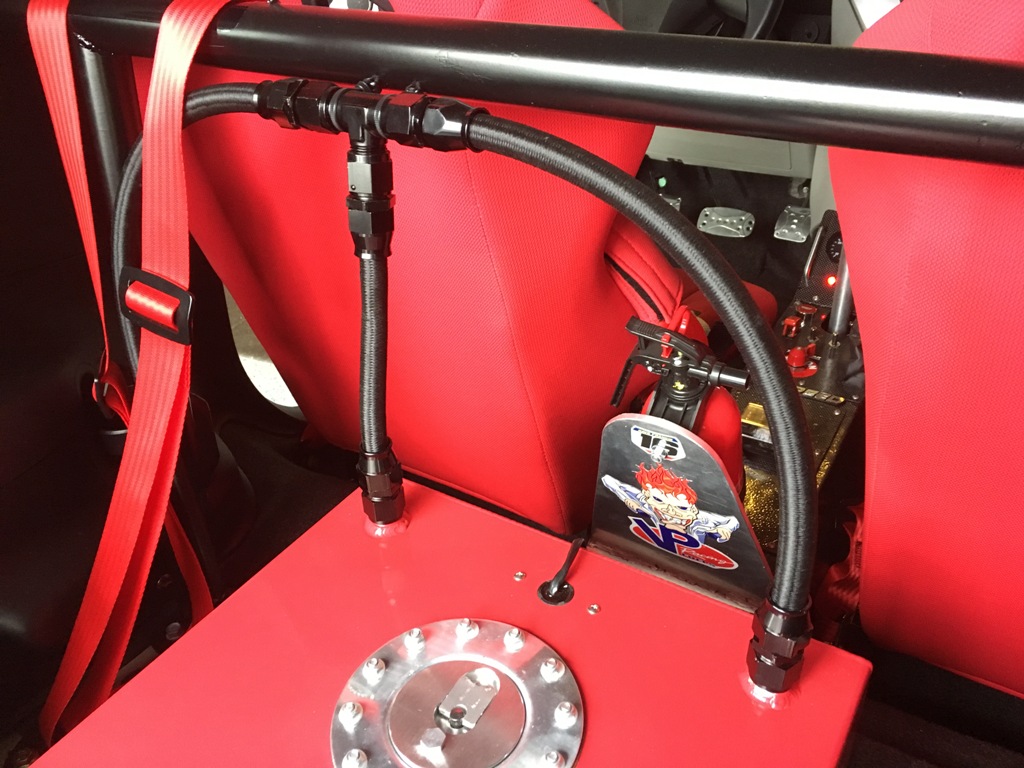
EVAP connections
Shown here is the vent line from the fuel cell coming through the rear floor, this joins the line from the front Fuel pump canister.
I made sure to use high quality Hoses, these are genuine stainless braided PTFE 10AN hoses, cheaper ones permeate gas and can lead to a bad smell of gas fumes in your garage even if you use an EVAP canister.

Charcoal EVAP canister
Although the EVAP canister is covered on another page Here, this is just a photo to show where the lines end up. The canister eventually vents to the atmosphere high behind the fuel filler cap, (where the old one did)
All done
The fuel cell now holds 8 gallons, as apposed to the old IQ fuel tank that held less than 7 gallons.
I`m sure the handling will be effected by moving the tank, due to now having a slightly higher center of gravity, but that`s the only realistic way I could have mounted it as there was no more room anywhere on the car.

Fire extinguisher and bracket
I fabricated up a nice strong bracket for the fire extinguisher that I installed. There is a page Here, on how I made it.

Fuel Gauge
The fuel cell is fitted with a sender unit so I can monitor the fuel level.
To match the other new gauges I installed a VDO fuel gauge on the dash, This is where the old IQ gauge used to be housed.
easy to wire up, and it is pretty accurate too.

Good use of the space
I had already done a rear seat delete (will cover that on another page at some point) so the space behind the front seats was not really being used for anything. The fuel cell will have a thin carbon fiber cover that goes over the silver fire retardant foil to cover the floor around it and just make it look a little nicer.
This completes the task of installing the fuel delivery system.